How to create and save automation blueprints in Home Assistant
Automation blueprints are pre-made automations that you can easily add to your Home Assistant instance. Each blueprint can be added as many times as you want.

- To create your first automation based on a blueprint, go to Settings > Automations & Scenes > Blueprints.
- Find the blueprint that you want to use and select Create Automation.
- This opens the automation editor with the blueprint selected.
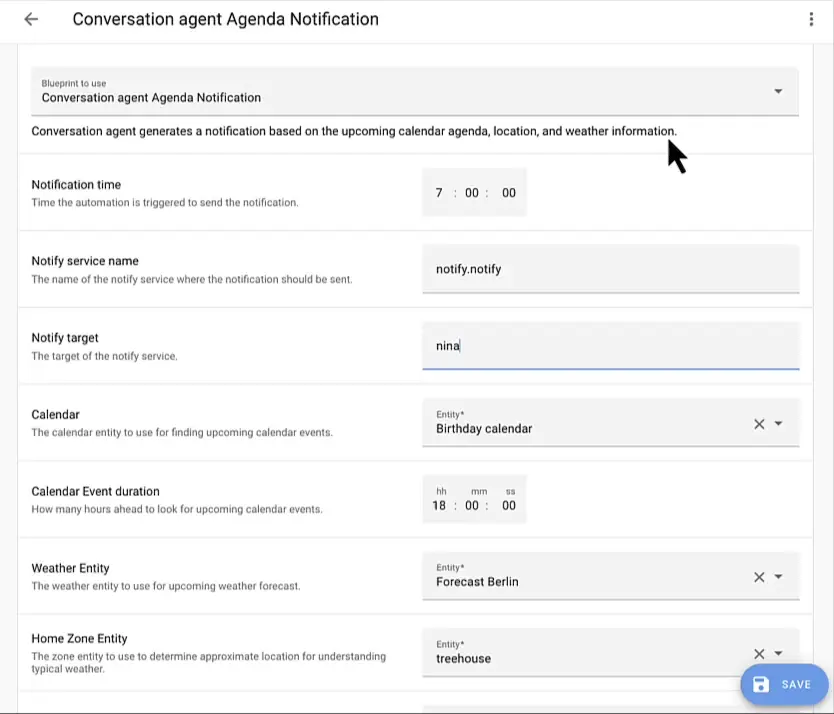
- Give it a name and configure the blueprint.
- Select the blue Save Automation button in the bottom right corner.


Home Assistant can import blueprints from the Home Assistant forums, GitHub, and GitHub gists.
-
To import a blueprint, first find a blueprint you want to import .
-
If you just want to practice importing, you can use this URL:
https://github.com/home-assistant/core/blob/dev/homeassistant/components/automation/blueprints/motion_light.yaml
Text
-
-
Select the blue Import Blueprint button in the bottom right.
- A new dialog will pop-up asking you for the URL.
-
Enter the URL and select Preview.
- This will load the blueprint and show a preview in the import dialog.
- You can change the name and finish the import.
The blueprint can now be used for creating automations.
You can tweak an imported blueprint by “taking control” of this blueprint. Home Assistant then converts the blueprint automation into a regular automation, allowing you to make any tweak without having to fully re-invent the wheel.
To edit an imported blueprint, follow these steps:
-
Select the blueprint from the list.
-
Select the and select Take control.
-
A preview of the automation is shown.
- Info: By taking control, the blueprint is converted into an automation. You won’t be able to convert this back into a blueprint.
- To convert it into an automation and take control, select Yes.
- If you change your mind and want to keep the blueprint, select No.
-
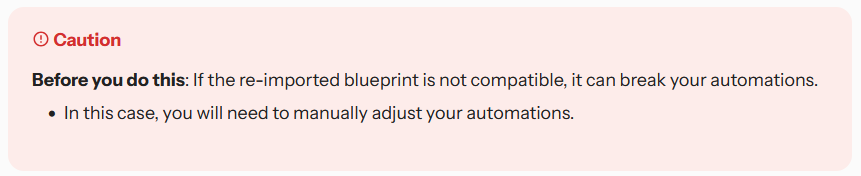
Blueprints created by the community may go through multiple revisions. Sometimes a user creates a blueprint, the community provides feedback, new functionality is added.
The quickest way to get these changes, is by re-importing the blueprint. This will overwrite the blueprint you currently have.
To re-import a blueprint
- Go to Settings > Automations & Scenes > Blueprints.
- On the blueprint that you want to re-import, select the three-dot menu, and select Re-import blueprint.
Blueprints created by the community may go through multiple revisions. Sometimes a user creates a blueprint, the community provides feedback, new functionality is added.
If you do not want to re-import the blueprint for some reason, you can manually edit its YAML content to keep it up to date:
- Navigate to the blueprints directory (blueprints/automation/). The location of this directory depends on the installation method. It’s similar to how you find configuration.yaml.
- Next, you must find the blueprint to update. The path name of a blueprint consists of:
- Open the YAML file with your editor and update its contents.
- Reload the automations for the changes to take effect.
The new changes will appear to your existing automations as well.
When you’re creating automations using blueprints and they don’t appear in the UI, make sure that you add back automation: !include automations.yaml from the default configuration to your configuration.yaml.